Watercolor Cards for Every Season
Simple washes, a few brushstrokes and handmade mail.
 Hannah Brooks6 min read
I send handmade cards for every birthday. Watercolor makes them quick and beautiful. It started years ago when I forgot to buy a card for my best friend’s thirtieth and, in a small panic, painted a blue wash with a few birds on a folded piece of paper. She still has it pinned to her fridge. Since then, a little stack of painted cards has lived in my desk drawer, ready for birthdays, thank-yous, new babies and the occasional “just because.”
You don’t need to know how to paint, just how to make a wash. That’s the secret I want to share today. Most of my cards are nothing more than a soft wash of color with a few simple details added on top. Once you learn that one technique, you can make a card for every season of the year in about fifteen minutes.
 Sponsored · Quilt Haven FabricsFat quarters from $3.50Thousands of prints, ships in a day.Shop fabric
Gathering your supplies
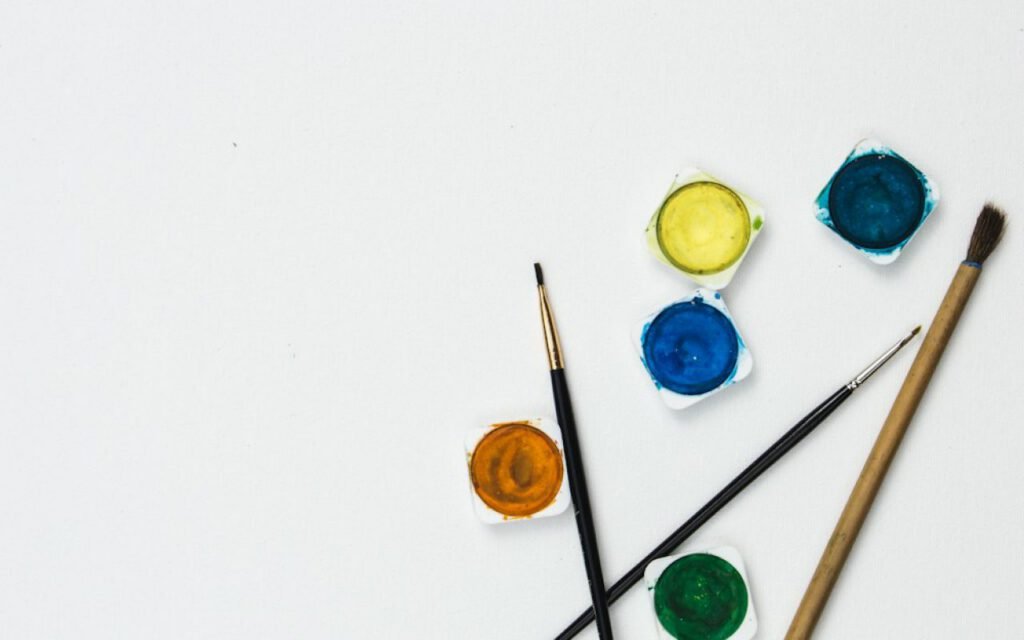
Watercolor is one of the most affordable art supplies to start with. Here’s what I keep on my craft table:
- Watercolor paper, cut to cards
- A small paint set
- One round brush
- A fine black pen
For paper, look for a pad labeled “cold press” with a weight of 140 lb. It’s thick enough to handle water without buckling too much, and its slightly bumpy texture makes washes look lovely. I cut a 9-by-12-inch sheet into four pieces, each 4½ by 6 inches, and fold them in half to make small cards, or I leave them flat and glue them onto blank folded cardstock.
A student-grade paint set with twelve colors is plenty. One round brush, around a size 8, does almost everything: big washes with the belly of the brush and tiny details with the tip. For the pen, choose a waterproof fine-liner so it won’t smear if your paint isn’t completely dry. You’ll also want two jars of water (one for rinsing, one clean), a paper towel and some painter’s tape.
The loose wash
Wet the paper, drop in color and let it bloom. Every card turns out different. This is called a wet-on-wet wash, and it’s the heart of every card I make.
- Tape your card to the table on all four sides. This keeps it flat and gives you crisp white borders when you peel the tape off.
- Brush clean water evenly over the paper. It should look shiny, not puddly.
- Load your brush with color and touch it to the wet paper. Watch it spread on its own.
- Add a second color next to the first and let them mingle where they meet.
- Leave it alone. Resist the urge to fuss with it. Let it dry completely, at least twenty minutes.
The beauty of a loose wash is that you can’t fully control it. Colors drift and bloom and make soft edges you could never paint on purpose. Embrace that. Some of my favorite cards came from washes that went “wrong.”
Handmade mail is the best mail.
Hannah
Add a little detail
Once it dries, a few lines with a fine pen turn a wash into a field or a sky. This is where the magic happens. A pale blue and green wash becomes a meadow when you add a few blades of grass and a fence post. A pink and orange wash becomes a sunset when you draw a row of tiny birds. A gray-blue wash becomes a snowy evening with a single small house and some dots of snow.
Keep your details simple and few. Three birds look better than twenty. One little tree says more than a forest. Leave plenty of the wash showing; that soft color is what makes people smile when they open the envelope.
Key takeaway: make five or six washes at once while you have your paints out. Let them all dry, then add details later. You’ll always have a card ready when a birthday sneaks up on you.
Ideas for every season
Here are the cards I make most often through the year. Use them as a starting point and change the colors to suit your mood.
Spring
A pale green wash fading into soft yellow. When it’s dry, paint a few round dots of pink and lavender with the tip of your brush, then add thin pen stems. Instant tulip patch. Perfect for Easter, new babies and Mother’s Day.
Summer
A bright turquoise wash at the top melting into sandy beige at the bottom. Draw a simple horizon line, a tiny sailboat and a couple of seagulls. Great for summer birthdays, graduation cards and notes to friends on vacation.
Fall
Drop warm oranges, reds and golds onto wet paper and let them blend into each other. When dry, add a few bare branches with your pen or the outline of a pumpkin. These are my go-to Thanksgiving cards and thank-you notes for teachers.
Winter
A deep indigo wash with a lighter strip at the bottom for snow. Once it’s dry, use a white gel pen or a dab of white paint to add snowflakes, and draw a little pine tree or a house with one glowing window. These make the coziest holiday cards, and my family now expects them every December.
When a wash misbehaves
Watercolor has a mind of its own, and that’s part of its charm. Still, a few common surprises are worth knowing about. If you see hard, frilly edges called “blooms” where you didn’t want them, you added water to a wash that was already half dry. Next time, either work faster or wait until it’s completely dry before touching it again. If your colors look muddy, you probably mixed too many together. Stick to two or three neighbors on the color wheel, like blue and green or red and orange, and they’ll stay bright.
If the paper buckles into hills and valleys, it’s either too thin or too wet. Taping all four edges helps a lot, and a heavy book placed on the dry card overnight flattens most of the waves. And if you simply don’t like a card? Cut it into gift tags. Nothing is wasted at my craft table.
Sending them out
A handmade card deserves a little extra care. I write my messages with the same fine pen I use for details, and I keep them short: a line or two and my name. The painting does most of the talking.
For envelopes, standard A2 envelopes fit a 4¼-by-5½-inch folded card perfectly. Kraft brown or cream envelopes look especially nice with watercolor. Sometimes I paint a tiny wash in the corner of the envelope too, so the card starts saying hello before it’s even opened. If you’re mailing a thicker card or one with a bit of glued ribbon, check with the post office about postage, since extra thickness can need more stamps.
Why it matters
In a world of texts and emojis, a card that arrives in the mailbox feels like a small celebration. People keep them. They tuck them into books, pin them on fridges, and pull them out years later. A painted card says, “I thought of you long enough to make something.”
So set up a little card station this weekend. Make a few washes, add a few lines, and put them in a drawer. The next time a birthday comes along, you won’t run to the drugstore. You’ll reach into that drawer and send something only you could make. Let me know which season you painted first, and share your cards with our community. I love seeing them.

Hannah Brooks
Hannah covered state politics for twelve years before co-founding Maple & Main. She lives in the Old North End and bikes to every council meeting.




2 Comments
Sharing this with my friends.
Saved this one for later. Really useful.