A Beginner’s Guide to Quilting
Fabric, rulers and the joy of a perfect corner.
 Hannah Brooks6 min read
Quilting looks intimidating. It’s really just sewing squares together very carefully. I put off learning for years because every quilt I saw at the county fair looked like it had taken a lifetime and a degree in geometry. Then a friend sat me down at her machine, handed me a stack of 5-inch squares and said, “Sew these into rows.” By the end of the afternoon I had a little patchwork top, a little wobbly, entirely mine. I’ve been hooked ever since.
Start small: a baby quilt or a table runner. A small project lets you learn every step of the process, from cutting to binding, without spending months on it. Once you’ve finished one, you’ll understand how a quilt comes together, and every bigger project after that is simply more of the same.
 Sponsored · Quilt Haven FabricsFat quarters from $3.50Thousands of prints, ships in a day.Shop fabric
The parts of a quilt
Before we pick up the rotary cutter, it helps to know what we’re making. Every quilt, from a tiny wall hanging to a king-size bed quilt, has three layers held together with stitching:
- The top: the decorative side, made from pieces of fabric sewn together.
- The batting: a soft middle layer that gives the quilt warmth and puffiness.
- The backing: a large piece of fabric for the underside.
These three layers are stitched together in a step called quilting, which is where the craft gets its name. Finally, the raw edges are wrapped in a strip of fabric called binding. That’s the whole recipe. Every fancy pattern you’ve ever admired is just a creative twist on those steps.
Gathering supplies
You can quilt on any basic sewing machine that sews a straight stitch. Beyond the machine, here’s my beginner kit:
- A rotary cutter with a 45 mm blade
- A self-healing cutting mat, at least 18 by 24 inches
- A clear acrylic quilting ruler, 6 by 24 inches
- 100 percent cotton quilting fabric
- Cotton or cotton-blend batting
- Neutral-colored cotton thread
- Pins or sewing clips, and an iron
For your first quilt, a pack of precut 5-inch squares, often called a charm pack, is a wonderful shortcut. The fabrics are already coordinated, the squares are already cut, and you can go straight to sewing.

Cut accurately
A rotary cutter and a clear ruler matter more than any fabric. In quilting, small errors add up fast. If each of your squares is off by just ⅛ inch, a row of ten squares can be more than an inch too long or too short, and suddenly nothing lines up. Careful cutting is the foundation of every good quilt.
Press your fabric before cutting so there are no wrinkles. Fold it neatly, line up the fold with a line on your mat, and place your ruler on top. Hold the ruler firmly with your fingers spread and away from the edge. Then roll the cutter along the ruler’s edge in one smooth motion, always cutting away from your body.
Key takeaway: rotary cutters are extremely sharp. Close the safety guard every single time you set yours down, even for a moment. It’s the one habit every quilter needs from day one.
A quilt is a story told in fabric.
Hannah
The quarter-inch seam
Every seam is ¼ inch. Get that right and your corners will meet. This is the golden rule of quilting. Patterns are written with a ¼-inch seam allowance built into every measurement, so if you sew a wider or narrower seam, your blocks will come out the wrong size.
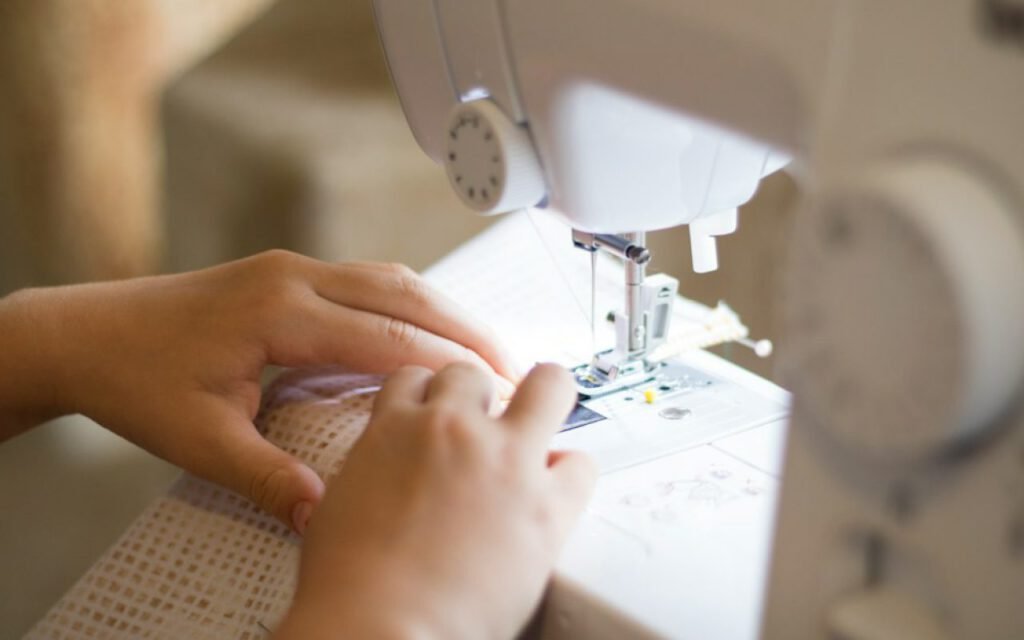
Many machines come with a ¼-inch presser foot, or you can buy one inexpensively. It has a little guide on the side that keeps your fabric edge exactly ¼ inch from the needle. If you don’t have one, place a strip of painter’s tape on your machine’s throat plate exactly ¼ inch from the needle and use it as a guide.
Test your seam
Cut two strips of fabric, each 2½ inches wide. Sew them together along the long edge with your ¼-inch seam and press. Measure the result. It should be exactly 4½ inches wide. If it’s narrower, your seam is too wide; if it’s wider, your seam is too narrow. Adjust and test again. Ten minutes of testing will save you hours of frustration.
Pressing and nesting
Press your seams to one side, usually toward the darker fabric so it won’t show through. When you sew two rows together, press the seams in each row in opposite directions. When you lay the rows together, the seams will “nest,” locking into each other like puzzle pieces. That’s how you get those crisp, perfectly matched corners.
Choosing fabric that plays nicely
When you’re picking fabric, aim for a mix of values: some light, some medium and some dark. Value matters even more than color. A quilt made entirely of medium prints can look flat from across the room, while a few light and dark pieces make the pattern pop. Look for 100 percent cotton made for quilting; it presses crisply, holds its shape and doesn’t stretch. Prewashing is a personal choice, but if you’re using deep reds or navies, wash them first so the dye won’t run into your lighter fabrics later.
A simple first quilt
Here’s a baby quilt you can finish in a few weekends. Take forty-two 5-inch squares and lay them out in seven rows of six squares. Move them around on the floor or a bed until you like the arrangement. Sew the squares in each row together, press, then sew the rows to each other, nesting your seams. You’ll end up with a top of about 27 by 31½ inches.
Next, make your quilt sandwich. Lay the backing face down on the floor and tape it flat, then smooth the batting on top, then the quilt top face up. Both the backing and batting should be about 3 inches larger than the top on every side. Pin through all three layers every 4 inches with curved safety pins.
For quilting, the easiest method is to sew straight lines ¼ inch from each seam, called stitching in the ditch or echo quilting. Use a walking foot if you have one; it feeds all three layers evenly. Finally, trim the extra batting and backing, and attach a binding made from 2½-inch strips folded in half. Hand-stitch or machine-stitch the binding to the back, and your quilt is done.
If binding feels like too much for your first project, there’s a gentler option called the “pillowcase” or envelope method. Place the top and backing right sides together on the batting, sew around the edges leaving an opening, turn it right side out and stitch the gap closed. It skips the binding entirely and still gives you a soft, finished quilt.

Your first stitch in a long story
Your first quilt won’t be perfect. A few corners might not meet, and some lines of quilting might wander. That’s completely fine. Quilts are meant to be used: wrapped around babies, spread on picnic tables, tucked over knees on cold evenings. After a few washes, the batting crinkles, the fabrics soften, and every small imperfection disappears into a cozy, lived-in texture.
Most of all, quilting is about patience and joy. Put on some music, enjoy the stack of fabric, and celebrate every row. When you finish, sign and date a label for the back. Someday, someone will be glad you did. Join one of our beginner quilting workshops if you’d like company along the way.
Hannah covered state politics for twelve years before co-founding Maple & Main. She lives in the Old North End and bikes to every council meeting.

Hannah Brooks
Hannah covered state politics for twelve years before co-founding Maple & Main. She lives in the Old North End and bikes to every council meeting.