



 CampingYour First Camping Trip: A No-Stress ChecklistTent, sleep system, kitchen and a backup plan.
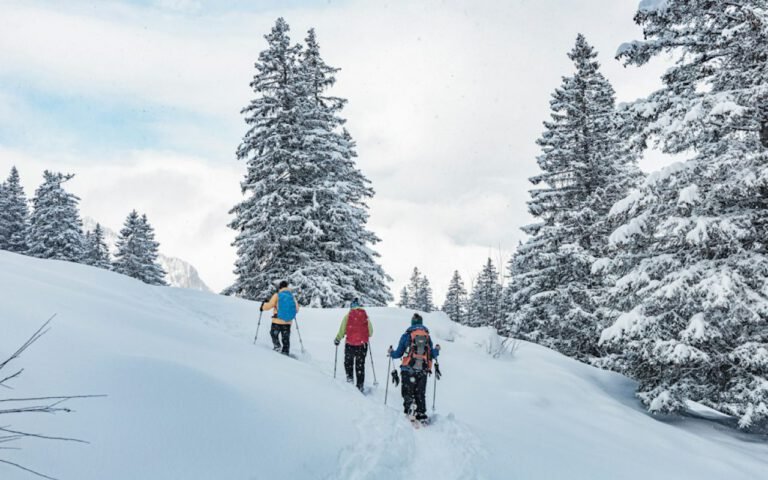
When the first big snow falls, a lot of hikers hang up their boots until spring. That is a shame, because some of the most beautiful days on the trail happen in winter, when the woods are quiet, the crowds are gone and every branch is dusted white. Snowshoeing is one of the easiest winter sports to try, and many parks rent gear right at the trailhead. If you can walk, you can snowshoe. There is no lift ticket, no lesson required and no steep learning curve. Here is how to get started on the right foot.
Why snowshoeing is so easy to learn
Snowshoes work by spreading your weight over a larger area, so you float on top of deep snow instead of sinking to your knees with every step. Modern snowshoes are light, compact and fitted with simple bindings that work with ordinary winter hiking boots. Many also have metal teeth, called crampons, under the foot to grip packed snow and icy patches.
The motion is just walking with a slightly wider stance, so the frames do not bump into each other. Within a few minutes, most beginners stop thinking about their feet altogether. Trekking poles with snow baskets add balance, especially on hills, and they are worth renting along with the snowshoes.
That simplicity makes snowshoeing a great family activity. Kids pick it up quickly, older hikers appreciate the low impact, and groups with different fitness levels can enjoy the same trail at their own pace.
Gear: rent before you buy
Many state and national parks with winter trails offer snowshoe rentals at a visitor center or nearby outfitter, often for $15 to $30 a day. Renting is the best way to try the sport and learn what you like before spending money. When you are ready to buy, choose snowshoes sized for your weight plus the gear you carry, and pick a model designed for the terrain you plan to hike most often.
For a first outing, here is a simple checklist:
- Snowshoes and adjustable trekking poles with snow baskets.
- Waterproof, insulated hiking boots with warm wool socks.
- Gaiters to keep snow out of the tops of your boots.
- A warm hat, a neck gaiter and two pairs of gloves or mittens.
- Sunglasses and sunscreen, since snow reflects strong sunlight.
- Water in an insulated bottle, plus high-energy snacks.
- A headlamp, map and a charged phone, because winter days are short.

Dress in layers
You’ll warm up fast. Avoid cotton. Those two short rules cover most of what you need to know about winter clothing. Snowshoeing is a real workout, especially in fresh powder, and many beginners overdress at the car only to find themselves sweating within ten minutes. Sweat-soaked clothing then chills you quickly the moment you stop for a break.
The simple layering system
Start with a base layer of wool or synthetic fabric that moves moisture away from your skin. Add an insulating layer, like a fleece or light puffy jacket, that you can remove when you are moving hard. Top it off with a windproof, water-resistant shell to block snow and wind. Cotton jeans and sweatshirts soak up moisture and lose their warmth when wet, so leave them at home.
The best approach is to start slightly cool and adjust as you go. Unzip vents, take off your hat or shed a layer before you overheat. When you stop for lunch or a photo, put the warm layer back on right away, before you start to feel cold.
Key takeaway: Stay dry to stay warm. Manage your layers often, and never let sweat build up under your jacket.
Picking your first trail
For a first trip, choose a short, mostly flat loop of two or three miles. Snowshoeing takes more energy than summer hiking, and a distance that feels easy in July can take twice as long in fresh snow. Many parks groom or mark dedicated snowshoe trails, which are ideal for beginners because they are easy to follow and well traveled.
Snow makes familiar trails feel brand new.
Our outdoors editor
That is one of the real joys of the sport. A meadow you have crossed a dozen times becomes a blank white canvas. Animal tracks tell stories of the night before, and the silence of a snowy forest is like nothing else. Take time to stop and notice it.
Respect other trail users while you are out. If a trail is groomed for cross-country skiing, snowshoe beside the ski tracks, not on them. Skiers rely on those grooves, and snowshoe prints can ruin them. Yield on narrow sections and give a friendly hello to everyone you pass.
Know avalanche risk
Stay on marked trails and check local avalanche forecasts in mountain areas. Most beginner snowshoe routes in valleys, forests and gentle rolling terrain carry little avalanche risk. But in the mountains, open slopes of about 30 degrees or steeper can release snow, and a trail that passes beneath them can be exposed even if you never climb the slope yourself.
Regional avalanche centers in many mountain states publish daily forecasts during the winter season. Read them before you go, and if the danger rating is elevated or you are unsure what it means for your route, choose a different trail. Venturing into avalanche terrain requires formal training, the right rescue gear and experienced partners. For beginners, the right call is simply to stay on marked, low-angle trails.
Other winter hazards deserve attention, too:
- Short daylight: start early and plan to finish well before sunset.
- Frozen water: never cross frozen lakes or streams unless you know the ice is safe.
- Changing weather: check the forecast and turn back if a storm moves in.
- Cold injuries: watch for numb fingers or pale skin, and warm up promptly.
Technique on hills
Flat trails need no special technique, but hills take a little practice. Going uphill, kick the toe of the snowshoe into the snow to set the crampon and keep your weight over your feet. Many snowshoes have a heel lift, a small bar that flips up under your heel, which reduces strain on your calves during long climbs. Shorten your trekking poles for the climb.
Going downhill, lengthen your poles, keep your knees slightly bent and lean back just a little. Plant your heels first so the frames bite into the snow. On steep or icy sections, take short steps and go slowly. If a slope feels too steep to handle comfortably, it probably is, and the right move is to find a gentler way around or turn back.
When you cross a hillside, kick the uphill edge of each snowshoe into the slope to create a small platform. It takes practice, so keep early outings on gentle terrain until you feel steady.
Your first winter adventure
Snowshoeing opens up an entire season of hiking that many people never experience. Rent a pair, pick a short marked trail, dress in smart layers and go see what your favorite park looks like under a fresh coat of snow. Tell someone your plan before you leave and turn around whenever conditions or energy run low. With a little preparation, winter could become your favorite time on the trail.
Outdoor activities carry real risks. Check conditions, tell someone your plan and know your limits.
Jesse has paddled every lake within 200 miles of home and is working on the rest.

Written by
Jesse Lane
Jesse has paddled every lake within 200 miles of home and is working on the rest.
6Articles
2026Writing since
Read next
CampingYour First Camping Trip: A No-Stress ChecklistTent, sleep system, kitchen and a backup plan. HikingLeave No Trace: Seven Principles Every Hiker Should KnowPlan ahead, pack it out, respect wildlife.
 CampingHammock Camping: Sleep Among the TreesStraps, bug nets and the diagonal lie.
 HikingHow to Read a Topographic MapContour lines, scale and the compass basics.
 PaddlingPaddleboarding: Find Your Balance in an AfternoonWide boards, calm water and knees first.
 HikingSummit Fever: Knowing When to Turn AroundThe smartest hikers set a turnaround time.
 CampingCampfire Cooking: Five Easy MealsFoil packets, skillet breakfasts and s’mores, upgraded.
 HikingTrail Etiquette: Who Yields to Whom?Hikers, bikers, horses and the uphill rule.
 HikingLayering for Cold-Weather HikesBase, mid, shell — and no cotton.