Brown Butter Chocolate Chip Cookies
Crisp edges, chewy middles and a toffee flavor that comes from browning the butter.
 Tom Becker6 min read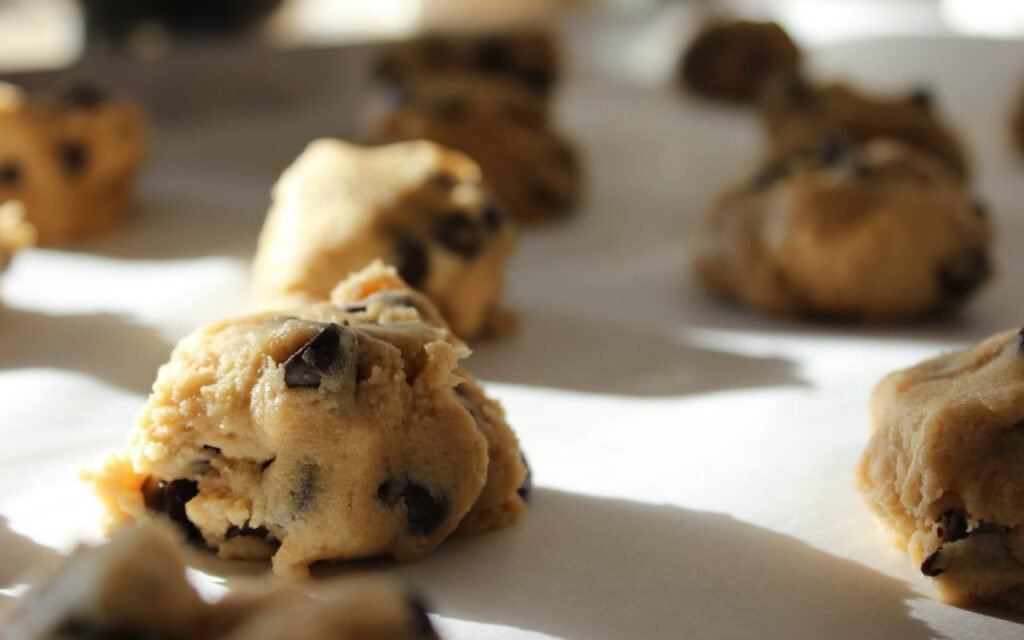

Tom Becker
Tom has kept a vegetable garden for thirty years and still gets excited about the first radish of spring.



Browning the butter takes five extra minutes and changes everything. Resting the dough overnight makes them even better, if you can wait. These are the chocolate chip cookies I bake when I want to impress someone, or when I just want the best cookie I know how to make: crisp, caramelized edges, soft and chewy middles, pools of melted dark chocolate and a deep toffee flavor that people can never quite place. A sprinkle of flaky salt on top makes every bite taste a little more like itself.
 Sponsored · Hearthside CandlesHand-poured in VermontTwelve new fall scents, out now.Shop candles
Chocolate chip cookies were the first thing I ever baked on my own, standing on a chair in my mom’s kitchen in Kansas City with a recipe card splattered with butter. I have baked thousands since, testing every trick I could find. Most made small differences. Two made big ones: browning the butter and letting the dough rest. This recipe combines both, and it has become the cookie my friends ask for at every holiday, birthday and backyard party.
What brown butter does
Butter is made of fat, water and milk solids. When you cook it past the melting point, the water bubbles away and the milk solids toast in the hot fat. They turn golden brown and give off a rich, nutty aroma, somewhere between toffee, hazelnuts and caramel. That toasted flavor carries through into every cookie, giving them a depth plain melted butter cannot match.
Because brown butter has lost some of its water, it also changes the texture of the cookies. They bake up a little chewier, with crisper edges and a more concentrated flavor. It is a small step with a big reward.
How to brown butter without burning it
Use a light-colored saucepan or skillet so you can see the color change. Cut the butter into pieces and melt it over medium heat. It will foam and sputter, then the foam will settle and you will see little specks forming on the bottom of the pan. Swirl the pan or stir constantly with a heatproof spatula. Once the specks turn amber brown and the butter smells nutty, pour it immediately into a heatproof bowl, scraping in all the toasty bits. This usually takes five to eight minutes. Brown butter turns to burned butter quickly, so stay close and trust your nose.
Sponsored · Hearthside CandlesHand-poured in VermontTwelve new fall scents, out now.Shop candlesIngredients
- 1 cup butter
- 1 cup brown sugar
- 1/2 cup white sugar
- 2 eggs
- 2 1/4 cups flour
- 1 teaspoon baking soda
- 2 cups chopped dark chocolate
- Flaky salt
Add a teaspoon of vanilla extract and about half a teaspoon of fine salt to the dough as well. Unsalted butter gives you the most control over seasoning. Use all-purpose flour, measured by spooning it into the cup and leveling it off. Chopping a bar of good dark chocolate, rather than using chips, gives you a mix of large chunks and tiny shards that melt into streaks throughout the dough. Chips work too, but they are designed to hold their shape, so you will not get those gooey puddles.

How to make it
- Melt the butter and cook until nutty and golden, then cool 10 minutes.
- Whisk in both sugars, then the eggs.
- Stir in the flour, baking soda and a pinch of salt, then the chocolate.
- Scoop onto lined sheets and bake at 350°F for 11–12 minutes.
- Sprinkle with flaky salt while warm.
Cool the butter first
Do not skip the 10-minute cooling time. Hot butter can scramble the eggs and melt the sugar too much, which leads to flat, greasy cookies. The butter should feel warm but not hot when you dip a finger near the edge of the bowl.
Whisk for shine
When you add the sugars and eggs, whisk vigorously for about a minute. The mixture will lighten slightly and turn glossy. That extra whisking helps create the thin, crackly tops you see on bakery cookies.
Scoop and space
Use a 2-tablespoon cookie scoop for even cookies that bake at the same rate. Leave about 2 inches between each one on a parchment-lined baking sheet, since they spread. Bake one sheet at a time on the middle rack for the most even results. The cookies are done when the edges are golden and the centers still look slightly underbaked. They will finish setting as they cool on the sheet.
Key takeaway: brown the butter until it smells nutty, let it cool before adding the eggs and pull the cookies from the oven while the centers still look soft.
Why an overnight rest is worth it
If you can wait, cover the dough and refrigerate it for at least 12 hours, or up to 72. During that rest, the flour fully absorbs the moisture from the eggs and butter. The sugars break down slightly and the flavors deepen, giving you a more caramel-like taste. Rested dough also spreads less in the oven, so the cookies come out thicker, with chewier centers and more evenly browned edges.
Cold dough will be firm, so let scooped portions sit at room temperature for about ten minutes before baking, or add an extra minute in the oven. If you cannot wait, the cookies are still delicious straight away. Think of the rest as a bonus, not a requirement.
Bake a few at a time
One of my favorite things about resting dough is that you do not have to bake it all at once. Scoop the dough into balls, store them in a container in the fridge and bake four or six whenever the craving strikes. Fresh, warm cookies on a Tuesday night feel like a small luxury, and they take only 12 minutes.
Make it your own
The base recipe is wonderful on its own, but it welcomes a few creative touches. Swap half the dark chocolate for milk chocolate or chopped toffee. Fold in a cup of toasted pecans or walnuts. Add a teaspoon of instant espresso powder to deepen the chocolate flavor. For a holiday twist, mix in dried cherries and white chocolate. And if you want cookies with dramatic, rippled edges, try the trick our recipe tester loves.
Bang the pan on the counter halfway through baking for rippled, bakery-style cookies.
Recipe tester Molly Grant
Open the oven at about the six-minute mark, lift the sheet a few inches and drop it flat onto the rack or stovetop. The puffed centers collapse, sending ripples out toward the edges. Repeat once or twice more before the cookies finish baking. It is loud, a little silly and a lot of fun.

Storing and freezing
Store baked cookies in an airtight container at room temperature for up to four days. A slice of bread tucked into the container helps keep them soft. To freeze, place scooped balls of dough on a baking sheet and freeze until solid, then transfer them to a freezer bag. They keep for up to three months and can be baked straight from frozen; just add a minute or two to the baking time. Baked cookies also freeze well and thaw in about 20 minutes on the counter.
Bake a batch this weekend, share them with someone you love and save a few balls of dough in the freezer for later. Use the servings scaler on the recipe card if you need a bigger batch for a party, and tell us how you like your cookies: crisp, chewy or somewhere in between.
Tom Becker
Tom has kept a vegetable garden for thirty years and still gets excited about the first radish of spring.


Start the conversation