


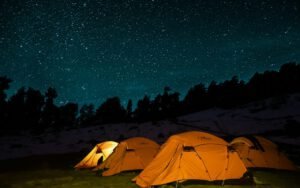

 CampingYour First Camping Trip: A No-Stress ChecklistTent, sleep system, kitchen and a backup plan.
Written by
Mira Shah
Mira climbs, coaches beginners and believes in the partner check above all else.
8Articles
2026Writing since
The campground is empty, the lake is frozen and the only sound is snow sliding off a pine branch. Winter camping offers a kind of solitude that summer trips never can. There are no crowds, no bugs and no fight for the best site. Winter camping can be peaceful and beautiful with good preparation, but that preparation matters more than in any other season. Cold leaves little room for mistakes. This guide covers the basics you need for a safe and comfortable first night out in the snow.
Start small and close to home
Your first winter trip should not be a deep backcountry expedition. Choose a drive-in campground, a state park with winter sites or a short hike to a known spot close to your car. Many parks keep a few loops open year-round, and some offer yurts or cabins that make a great stepping stone. Being close to the car gives you a safe exit if something goes wrong or you simply get too cold.
Pick a night with mild winter weather for your first try, perhaps in the 20s or 30s rather than below zero. Check the forecast carefully, including wind, which makes cold temperatures feel much colder. Plan your trip around a full day of daylight, since winter evenings arrive early and setting up camp in the dark adds challenges.
Going with an experienced friend or joining a guided winter camping trip is one of the best ways to learn. Many outdoor clubs and outfitters run beginner trips that teach skills in a supportive setting.
Gear that makes the difference
The right gear turns a miserable night into a cozy one. You do not need to buy everything new. Many outdoor shops rent winter sleeping bags, pads and four-season tents. Focus on these essentials:
- A sleeping bag rated for colder than the expected low. A bag’s rating is often a survival limit, not a comfort level.
- Two sleeping pads. A closed-cell foam pad beneath an insulated inflatable pad blocks the cold ground.
- A sturdy tent. A four-season tent handles wind and snow better than a summer model.
- Warm layers and spares. Bring extra socks, gloves and a dry base layer for sleeping.
- A stove that works in the cold. Many campers prefer liquid-fuel stoves in deep cold.
- Insulated bottles and a thermos. Water freezes quickly, so store bottles upside down and inside your pack.
Lithium batteries hold up better in cold than alkaline ones, and keeping your phone and headlamp in an inside pocket or your sleeping bag overnight extends their life.

Stay dry
Sweat is the enemy. Vent layers before you overheat. That single principle is the heart of winter camping. Hiking or snowshoeing into camp with a pack generates a lot of heat. If you sweat into your clothing, that moisture chills you quickly once you stop moving, and damp layers lose much of their insulating power.
Cold is manageable. Wet and cold is dangerous.
Mountain guide (fictional)
To stay dry, dress in thin layers you can add or remove easily. Start your hike slightly cool, open zippers as you warm up and take off your hat before you start sweating. When you reach camp, change into a dry base layer right away, then add a warm puffy jacket before you start to feel chilled. Keep snow out of your boots with gaiters and brush snow off your clothes before entering the tent.
Managing moisture overnight
Your breath and body release moisture all night, which can form frost on the inside of the tent. Crack the vents to let air circulate, even though it feels counterintuitive. Keep damp gloves and socks inside your sleeping bag, close to your body, so they dry with your body heat instead of freezing solid by morning.
Key takeaway: Stay dry at all costs. Vent early, change into dry layers at camp and keep moisture away from your sleeping bag.
Setting up camp in the snow
Pick a sheltered site out of the wind, away from dead trees and branches heavy with snow. Avoid low spots where cold air settles overnight and steep slopes where snow could slide. Before pitching your tent, stamp down a flat platform with your boots or snowshoes and let it firm up for 20 or 30 minutes. A packed base prevents lumps and dips under your sleeping pad.
Regular tent stakes often do not hold in snow. Use wide snow stakes or bury stuff sacks filled with snow as anchors, a technique called deadman anchors. Tie the guy lines tight, because wind can pick up overnight.
Plan a simple routine to keep things running smoothly:
- Stamp out a tent platform as soon as you arrive.
- Change into dry layers and put on your warm jacket.
- Pitch the tent and lay out both sleeping pads and your bag.
- Start melting snow for water and cooking dinner.
- Fill bottles for the night and the morning before bed.
Melting snow takes a lot of fuel and time, so bring more fuel than you think you need. Add a little water to the pot before adding snow to avoid scorching it. Stay hydrated. Dehydration is common in winter because cold air is dry and you may not feel thirsty.

Warm bottle trick
A bottle of hot water in your sleeping bag adds warmth. It is one of the oldest and most effective tricks in winter camping. Before bed, fill a sturdy, leakproof bottle with hot water, close it tightly and slip it into a sock to protect your skin. Place it near your core or between your thighs, where large blood vessels carry warmth through your body. By morning, you will also have water that is not frozen.
A few other tips for a warm night:
- Eat a warm, high-calorie dinner, and keep a snack in your bag for the middle of the night.
- Do a few jumping jacks before bed to warm up, without breaking a sweat.
- Wear a warm hat and dry socks to sleep.
- Do not breathe into your sleeping bag, which adds moisture. Use a neck gaiter instead.
- Use the bathroom before bed. Your body wastes energy keeping a full bladder warm.
Know the warning signs of cold injuries, too. Shivering that will not stop, confusion, clumsy movement and numb or pale fingers and toes are signs to warm up immediately and head for the car or shelter. If symptoms are serious, seek medical help.
Morning is often the coldest part of a winter camping trip. Keep tomorrow’s clothes inside your sleeping bag so they are warm when you put them on, and get the stove going for a hot drink before you start packing. Move steadily to stay warm, but take your time with the stove and fuel. Cold fingers make careless mistakes easy, and a slow, deliberate pack-up keeps gear from getting lost in the snow. Before you leave, check your site for any trash and pack it out, just as you would in summer.
Enjoy the quiet season
Winter camping is not for every trip, but with careful planning it can become one of the most rewarding ways to experience the outdoors. Start close to home, rent good gear, stay dry and bring that hot water bottle. You may find that a frosty, star-filled night in the snow is the most peaceful camping you have ever done.
Outdoor activities carry real risks. Check conditions, tell someone your plan and know your limits.
Written by
Mira Shah
Mira climbs, coaches beginners and believes in the partner check above all else.
8Articles
2026Writing since
Read next
CampingYour First Camping Trip: A No-Stress ChecklistTent, sleep system, kitchen and a backup plan. CampingKayaking for Beginners: Calm Water FirstPaddle basics, life jackets and picking the right day.
 CampingRock Climbing: How to Start SafelyGyms, guides and the knots you must know.
 CampingStargazing at Camp: What to Look For TonightThe Milky Way, planets and meteor showers.
 CampingHammock Camping: Sleep Among the TreesStraps, bug nets and the diagonal lie.
 ClimbingClimbing Gyms: A Guide to Your First VisitShoes, chalk and bouldering grades.
 CampingCampfire Cooking: Five Easy MealsFoil packets, skillet breakfasts and s’mores, upgraded.
 CampingCanoe Camping: Paddle In, Camp OutPacking, portages and calm-water routes.
 HikingLayering for Cold-Weather HikesBase, mid, shell — and no cotton.
Start the conversation