




 LearnLearning Guitar as an Adult: Your First 30 DaysFour chords, sore fingers and your first song.
Written by
Lucy Ford
Lucy is a recording engineer who explains the studio without the jargon.
6Articles
2026Writing since
A generation ago, recording a decent-sounding song meant booking a studio, paying by the hour and hoping you nailed it before the money ran out. Today, the core tools fit on a desk. You can make good-sounding demos at home with simple gear, and plenty of songs that started in bedrooms, basements and walk-in closets have gone on to reach real audiences. The secret is not spending a fortune. It is knowing where a modest budget makes the biggest difference.
We asked recording engineers, home producers and B-Side readers how they record on a tight budget. Their advice was practical, honest and surprisingly consistent: get the room right, keep the gear simple and focus on the performance.
The room matters
Before you spend a single dollar on gear, look at the space where you will record. Most rooms in a typical house or apartment have hard, flat surfaces like bare walls, windows and wood floors. Sound bounces off them, creating echoes and a boxy, hollow tone that no amount of editing can fully fix later.
A closet full of clothes is a surprisingly good vocal booth. All that fabric absorbs reflections and soaks up stray sound, leaving a clean, dry vocal. Many home recordists simply open the closet door, set up a microphone facing the clothes and record standing in the doorway. It is not glamorous, but it works remarkably well.
Quick ways to tame a room
- Hang heavy blankets or comforters behind and beside the microphone.
- Record in a carpeted room, or lay a rug on hard floors.
- Keep the mic away from windows and bare corners.
- Bookshelves full of books help break up reflections.
- Turn off fans, refrigerators and air conditioners while you record.
Keep it simple
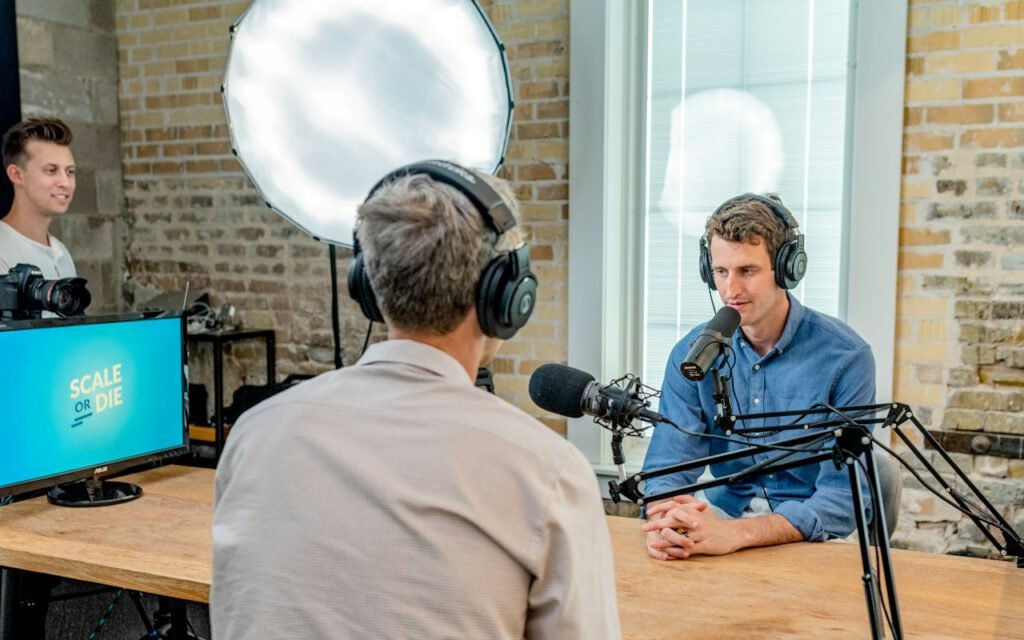
One decent microphone and an audio interface go a long way. The interface is a small box that connects your microphone or instrument to your computer, converting the sound into digital audio. Entry-level interfaces with one or two inputs are widely available for around $100 to $200 and are more than enough for most home projects.
For the microphone, many home studios start with one of two types. A dynamic microphone is rugged, affordable and good at rejecting room noise, which makes it forgiving in an untreated space. A large-diaphragm condenser microphone captures more detail and is popular for vocals and acoustic instruments, though it also picks up more of the room. Either can produce excellent results. Choose based on what you record most and how quiet your space is.
You will also need closed-back headphones so the backing track does not bleed into your microphone, a sturdy mic stand, a cable and a pop filter, which is a small screen that softens hard “p” and “b” sounds. That is the whole setup.
A sample starter budget
- Audio interface: about $100 to $200.
- Microphone: about $80 to $200.
- Closed-back headphones: about $50 to $120.
- Stand, cable and pop filter: about $40 to $60.
- Recording software: free options are available, and many interfaces include a light version of paid software.
Shopping used is a smart way to stretch a budget further. Microphones and interfaces tend to last for years, and local music shops and online marketplaces often have good deals. Just test everything before you buy if you can.
Recording instruments
Vocals get most of the attention, but the same principles apply to instruments. For an acoustic guitar, many recordists start by aiming the microphone at the spot where the neck meets the body, about a foot away. Pointing it straight into the sound hole tends to sound boomy. Small adjustments of an inch or two can change the tone noticeably, so take a few minutes to experiment and listen back on headphones before you commit.
Electric guitar and bass can often plug straight into the interface’s instrument input, and free amp simulation software can give you a wide range of tones without ever turning on a loud amplifier. That is a big advantage in an apartment. Keyboards with a line output connect the same way. Drums are the hardest instrument to record at home, so many budget producers program drum parts in software or record them at a rehearsal space and bring the files back.
Whatever you record, label your tracks as you go. “Vocal take 3” and “acoustic double” will mean something next week. “Audio 14” will not.
Recording tips that cost nothing
Once your gear is set up, a few habits will improve your recordings more than any upgrade. Position matters most. For vocals, start with the microphone about six to twelve inches from your mouth, slightly off to the side, and adjust from there. Move closer for a warmer, more intimate sound and farther back for a more open one.
Watch your levels. Sing or play the loudest part of the song and set the input gain so the meter stays comfortably in the middle, never touching red. Recording a little quieter is always safer than recording too loud, since distortion from clipping cannot be undone. Record several takes, too. It is far easier to choose the best one later than to recreate the energy of a session.
Save often and back up everything. Hard drives fail at the worst possible moments. Keep a copy of every session on a second drive or a cloud service, and name your files clearly so you can find that perfect take months later.
Performance first
A great performance beats expensive gear every time.
Lucy Ford, recording engineer (fictional)
Lucy Ford has worked in professional studios for nearly two decades, and she says the biggest mistake home recordists make is chasing gear instead of chasing the take. “People will spend a month researching microphones and then rush through the vocal in twenty minutes,” she said. “Listeners do not hear your gear. They hear whether you meant it.”
Warm up before you record. Rehearse the song until you can play it without thinking. Take breaks so your ears and voice stay fresh. And do not be afraid of small imperfections. A tiny crack in a voice or a slightly loose guitar part can make a recording feel human and alive.
Mixing on a budget
When it is time to mix, keep things simple. Balance the levels first, then use a little equalization to clean up muddy low end, and add a touch of reverb so the vocal sits naturally. Check your mix on several speakers, including earbuds, a car stereo and a phone, since most people will hear it that way. Take a break and listen again the next day with fresh ears. You will hear problems you missed and, just as often, realize the mix was better than you thought.
Key takeaway: Treat the room, buy a simple interface and one good microphone, and spend your energy on the performance.
Press record
The best home studio is the one you actually use. It is easy to put off recording until you have the perfect setup, but every song you capture teaches you something about your gear, your room and your own sound. Start with what you have, hang a few blankets, clear out the closet and press record tonight. Your first demo does not need to be perfect. It just needs to exist.
Written by
Lucy Ford
Lucy is a recording engineer who explains the studio without the jargon.
6Articles
2026Writing since
Read next
LearnLearning Guitar as an Adult: Your First 30 DaysFour chords, sore fingers and your first song. StudioHow a Song Gets Made: Inside a Recording SessionFrom demo to final mix in five steps.
 LearnPiano Practice Tips From a Lifelong TeacherSlow hands, steady counting and pieces you actually like.
 LiveBusking 101: Playing on the StreetPermits, pitches and how to draw a crowd.
 LearnThe Violin, Explained: Why It’s So Hard (and So Worth It)No frets, perfect pitch and a lot of patience.
 LearnDrum Kit Basics: What Every Beginner NeedsPractice pads, sticks and a little consideration for the neighbors.Jazz & VenuesInside a Late-Night Jam SessionWhere musicians test ideas and make friends.
 Jazz & VenuesWhat Does a Music Producer Actually Do?Part coach, part engineer, part therapist.
 LearnSinging Lessons: Are They Worth It?What a good vocal coach actually teaches.
Start the conversation