



 DIY ProjectsBuild Your First Raised Garden BedWood, soil and what to plant first.
Written by
Rosa Bell
Rosa is a master gardener who grows 40 kinds of tomatoes and names none of them.
11Articles
2026Writing since
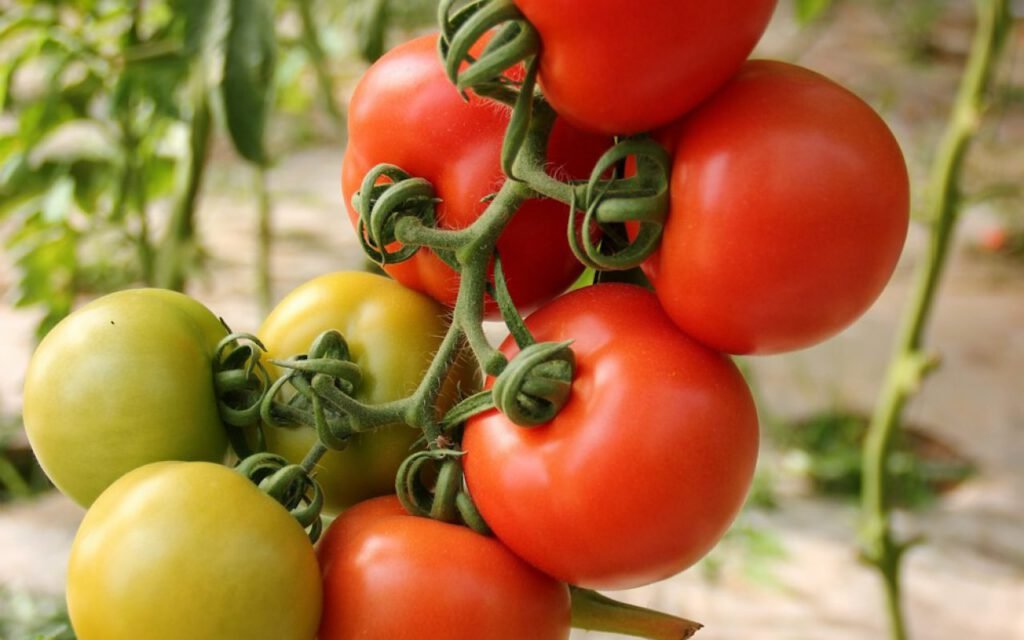
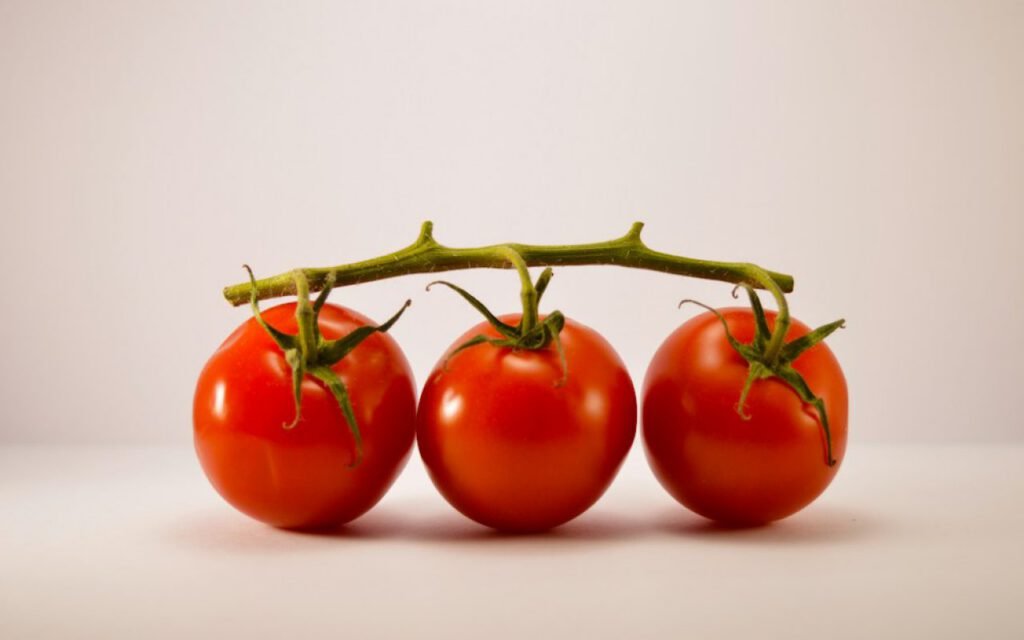
Tomatoes need plenty of sun — six to eight hours a day — plus support and even watering. Get those three things right and you will be slicing thick, sun-warm tomatoes onto bread by midsummer. Get them wrong and you will spend August staring at tall green vines with a handful of cracked fruit. The difference is not luck or a mysterious green thumb. It is a few simple habits, practiced from the day you bring a seedling home until the day you build the first sandwich. Here is the whole season, step by step.
Choose the right plants
Tomatoes come in two main growth types, and knowing the difference makes planning easier. Determinate varieties grow to a set height, often 3 to 4 feet, and ripen most of their fruit over a few weeks. They are tidy, great for containers and ideal if you want a big batch for sauce. Indeterminate varieties keep growing and fruiting until frost, sometimes reaching 6 feet or more. They need taller support but reward you with a steady harvest all summer.
For a first garden, try one of each: a compact paste tomato for cooking and a vigorous slicer for sandwiches. A cherry tomato is a wonderful third choice because it is forgiving, productive and almost impossible to resist eating straight off the vine.
Picking a healthy seedling
At the garden center, look for stocky plants with dark green leaves and a thick stem. Avoid tall, skinny seedlings and any that already have flowers or fruit, which can slow them down after transplanting. Check the undersides of leaves for spots or tiny insects before you buy.
Plant deep
Bury the stem up to the first leaves; it will grow extra roots. This is one of the few plants where deep planting is not only safe but helpful. Those tiny hairs along a tomato stem turn into roots when they touch soil, giving the plant a stronger anchor and better access to water.
- Wait until nighttime temperatures stay above 50°F and the danger of frost has passed in your area.
- Pinch off the lower leaves, leaving the top set or two.
- Dig a hole deep enough to bury about two-thirds of the stem, or dig a shallow trench and lay the stem sideways.
- Mix a handful of compost into the hole.
- Set the plant in, backfill gently and water well.
- Space plants 2 to 3 feet apart so air can move between them.
Choose the sunniest spot you have. If your yard is shady, a large container on a bright driveway or deck can be the best tomato bed on the property.
Support from day one
Put your stake, cage or trellis in at planting time. Adding it later risks spearing roots you cannot see. There are three popular options:
- Cages. Simple and quick. Choose sturdy, tall cages; the flimsy cone-shaped ones often tip over under a heavy indeterminate plant.
- Stakes. A 6- to 8-foot wooden or metal stake with soft ties every foot or so. Great for small spaces.
- Trellis or string. A cattle-panel arch or overhead string system looks beautiful and makes picking easy.
As the plant grows, keep tying it loosely to its support. Many gardeners pinch off suckers, the small shoots that form where a branch meets the main stem, on indeterminate varieties to keep plants manageable. It is optional, and determinate types generally do not need it.
A homegrown tomato will ruin store-bought ones forever.
Rosa Bell, master gardener (fictional)
Water evenly
Uneven watering can cause split fruit and other problems. When a dry spell is followed by a heavy soaking, fruit swells faster than its skin can stretch, and it cracks. Irregular moisture is also linked to blossom end rot, the dark, sunken patch on the bottom of a tomato.
The goal is steady moisture, not constant wetness. In most gardens, that means a deep watering of about 1 to 2 inches per week, adjusted for rain and heat. Water at the base of the plant in the morning so leaves stay dry, which helps limit disease. A soaker hose or drip line on a simple timer is one of the best investments a tomato grower can make.
Mulch is the secret partner to good watering. Once the soil warms, spread 2 to 3 inches of straw, shredded leaves or untreated grass clippings around each plant. Mulch keeps soil moisture even, cools roots on hot days and stops soil from splashing onto lower leaves.
Feeding and troubleshooting
Tomatoes are hungry plants. Work compost into the bed before planting, then side-dress with more compost or a balanced, tomato-specific fertilizer when the first fruit sets. Follow the label; too much nitrogen gives you lush leaves and few tomatoes.
Common problems to watch for
Yellowing lower leaves with brown spots often signal a fungal disease. Remove affected leaves, improve airflow and keep foliage dry. Large green caterpillars that strip leaves overnight are tomato hornworms; hand-pick them in the early morning. Flowers that drop without setting fruit usually mean nights are too hot or too cool, and the plant will catch up when the weather settles. If you are unsure what you are seeing, take a photo or a sample leaf to your county extension office for a free diagnosis.
Growing in containers
No yard? Tomatoes grow beautifully in pots on a sunny balcony, deck or driveway. Choose a container that holds at least 5 gallons for a compact variety and 10 to 15 gallons for a full-size indeterminate plant. Bigger pots hold more soil, which means more even moisture and fewer emergencies on hot afternoons. Use a quality potting mix rather than garden soil, which packs down and drains poorly in a container, and make sure there are plenty of drainage holes in the bottom.
Container plants dry out much faster than those in the ground. During a summer heat wave, a large pot may need water every day, and small pots may need it twice. Push a finger into the mix up to the second knuckle; if it feels dry, it is time to water slowly until a little runs out the bottom. Because frequent watering washes nutrients away, plan to feed potted tomatoes a bit more often than garden plants, following the directions on your fertilizer label.
Key takeaway: Full sun, deep planting, early support and steady water are the four habits behind nearly every great tomato harvest.
Harvest and the perfect sandwich
Pick tomatoes when they are fully colored and give slightly when you squeeze gently. If a hot spell or a hungry squirrel is a threat, you can pick them when they first blush and let them finish ripening on the counter, stem side down. Never store ripe tomatoes in the refrigerator if you can help it; the cold dulls their flavor.
Then comes the reward. Toast two slices of good bread. Spread them generously with mayonnaise. Slice your ripest tomato thick, lay it on in a single layer and sprinkle with flaky salt and fresh black pepper. Close it up, lean over the sink and take the first bite. That is the moment all the watering, tying and waiting was for, and it is the reason so many gardeners plant tomatoes again every single spring.
Written by
Rosa Bell
Rosa is a master gardener who grows 40 kinds of tomatoes and names none of them.
11Articles
2026Writing since
Read next
DIY ProjectsBuild Your First Raised Garden BedWood, soil and what to plant first. DecorA Living Room Refresh for Under $500Paint, light and the art of moving furniture.
 DecorHouseplants That Are Nearly Impossible to KillPothos, snake plants and other forgiving friends.
 GardenBackyard Chickens: What Nobody Tells YouCoops, rules and a lot of fresh eggs.
 DIY ProjectsPotting Bench Projects for a WeekendA simple build that organizes everything.
 HouseplantsRepotting Houseplants: When and HowRoots, pot size and fresh soil.
 DIY ProjectsComposting at Home: Easier Than You ThinkGreens, browns and a little patience.
 GardenStarting Seeds Indoors: A Beginner’s GuideTrays, light and the patience to wait.HouseplantsLow-Light Plants for North-Facing RoomsGreen even without much sun.
Thanks for explaining this so clearly.
Great reporting — please keep following this story.