




 DIY ProjectsBuild Your First Raised Garden BedWood, soil and what to plant first.
Written by
Rosa Bell
Rosa is a master gardener who grows 40 kinds of tomatoes and names none of them.
11Articles
2026Writing since
Every rose in my yard got its start as a nervous pruning session. Pruning helps roses stay healthy and bloom more, and the first time I stood in front of an overgrown climber with a pair of shears, I was sure I was about to ruin it. I didn’t. Timing depends on your climate and rose type, but once you understand a few simple rules, pruning stops being scary and becomes one of the most satisfying jobs on the garden calendar.
This guide walks through when to prune, where to cut and how much to take off, with notes for the most common types of roses you’ll find in American gardens. Grab a cup of coffee, find your gloves and let’s get your bushes ready for their best season yet.
When to prune
The main pruning for most roses happens in late winter or early spring, just as the buds begin to swell but before the new leaves fully open. A simple rule many gardeners follow is to prune when the forsythia blooms. In mild climates like Southern California or the Gulf Coast, that can be as early as January. In colder places like Minnesota or upstate New York, it may not happen until April.
Waiting until the worst frost has passed protects tender new growth. If you prune too early and a hard freeze follows, the fresh shoots can be damaged, and you’ll have to cut again. If you prune too late, the plant has already spent energy on growth you’re about to remove. Neither mistake is fatal, but good timing gives your roses a head start.
Different roses, different schedules
- Hybrid teas and grandifloras: Prune hard in early spring. These bloom on new wood, so a firm cut encourages strong stems and big flowers.
- Floribundas and shrub roses: Prune moderately in early spring, shaping the plant and removing about a third of the growth.
- Climbers: Keep the main canes and trim the side shoots back to a few buds in early spring.
- Once-blooming old garden roses and ramblers: Prune right after they finish flowering in summer, because they bloom on last year’s wood.
If you aren’t sure what kind of rose you have, watch it for a full season. A rose that blooms in waves from late spring to fall is almost certainly a repeat bloomer, and early spring pruning is a safe bet.
Clean tools
Sharp, clean pruners make smooth cuts that heal faster. A dull blade crushes the stem instead of slicing it, leaving a ragged wound that invites disease and pests. Before I start, I wipe my blades with rubbing alcohol and run a sharpening stone along the edge a few times. It takes two minutes and makes a real difference.

Here is what I keep in my pruning basket:
- Bypass hand pruners for stems up to about half an inch thick
- Long-handled loppers for thicker canes
- A small pruning saw for old, woody stems at the base
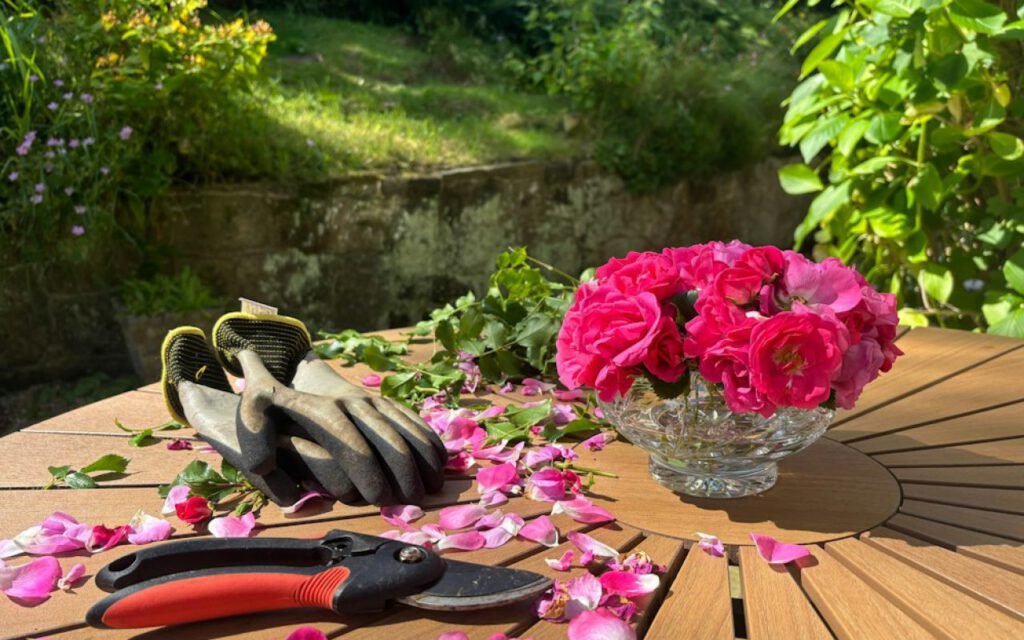
- Thick gloves with long cuffs to protect wrists and forearms
- A bucket or tarp to collect clippings
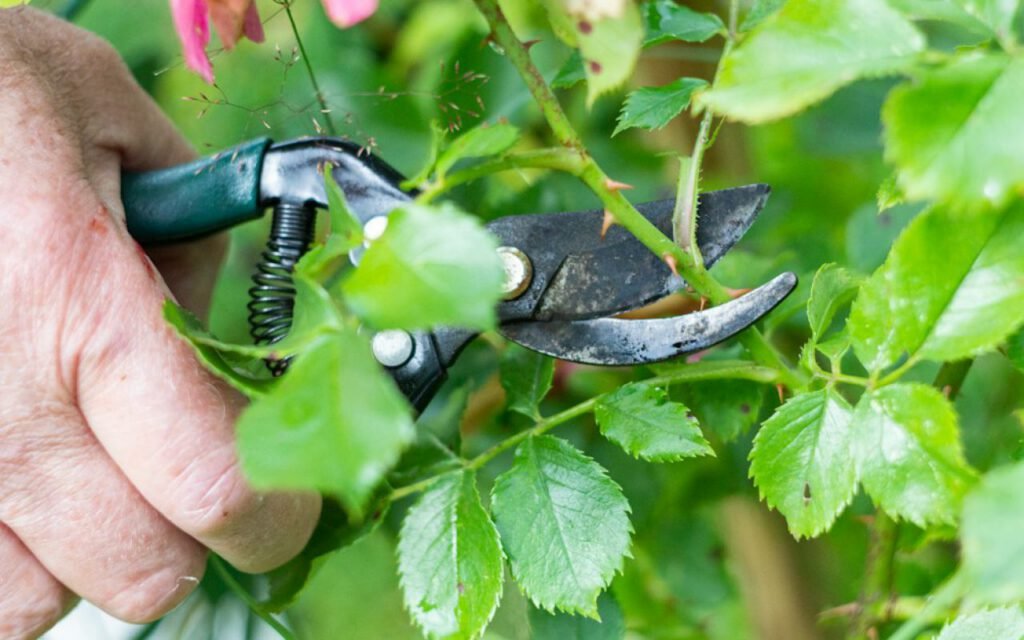
Choose bypass pruners rather than anvil pruners for roses. Bypass blades work like scissors and leave a clean edge, while anvil styles tend to pinch. If you move from one diseased plant to another, wipe the blades again so you don’t carry problems around the garden.
Don’t be afraid to cut. Roses are tougher than they look.
Rosa Bell, master gardener (fictional)
Cut above a bud
Cut at an angle just above an outward-facing bud. That’s the single most useful sentence in rose pruning. A bud is the small bump on the cane where a leaf once grew, and it’s where the next stem will appear. By choosing a bud that faces away from the center of the plant, you direct new growth outward, which opens up the middle of the bush.
Make the cut about a quarter inch above the bud, sloping down and away from it. The angle lets rain run off instead of pooling on the bud. Cut too close and you can damage the bud; leave too much stem and the stub will die back and turn brown.
The four Ds come first
Before you shape anything, remove wood that is dead, damaged, diseased or simply dying. Dead canes are gray or brown and brittle. Cut them back to healthy green tissue with a creamy white center, called the pith. If the center is brown, keep moving down the cane until you find clean, pale wood.
Next, take out any canes that cross or rub against each other. Friction creates wounds, and wounds let in trouble. Then remove thin, spindly stems that are thinner than a pencil. They rarely produce good flowers and mostly crowd the plant.
How much to take off
This is where beginners hesitate most, and it’s where Rosa Bell’s advice matters. For hybrid teas, many gardeners cut the plant back to about 12 to 24 inches tall, keeping three to five strong, evenly spaced canes. For floribundas and shrub roses, a lighter hand works better: take off about a third of the height and focus on creating a rounded, open shape.
Aim for a vase shape with an open center. Good airflow through the middle of the bush is one of the best defenses against black spot and powdery mildew, two common fungal problems in humid summers. Sunlight reaching the interior also encourages new shoots from the base.
For climbers, leave the long main canes in place and tie them as horizontally as you can along a fence or trellis. Horizontal canes produce more flowering side shoots. Trim those side shoots back to two or three buds, and remove one or two of the oldest main canes every few years to keep the plant vigorous.
Key takeaway: Remove the bad wood first, then shape the plant, and stop once it looks open and balanced. You can always cut more, but you can’t put a cane back.
After the cuts
Once the pruning is done, rake up every clipping and fallen leaf around the base. Old leaves can harbor fungal spores, and clearing them away gives the new season a clean start. Don’t add diseased material to your compost pile; bag it for yard waste pickup instead.
Next, give your roses a good meal. A balanced rose fertilizer or a few inches of well-rotted compost around the base, kept a couple of inches from the canes, supports the burst of growth that’s about to come. Follow the package directions on any fertilizer, and water deeply afterward. A fresh layer of mulch, two to three inches deep, helps hold moisture and keep weeds down as the weather warms.
Throughout the summer, keep up with light maintenance. Deadhead spent blooms on repeat-flowering roses by cutting back to the first set of five leaflets, and watch for any canes that die back or show signs of disease. If you notice a problem you can’t identify, your county extension office or a local garden center is a great place to ask for help.
Your first season
The first time you prune, it can feel like you’ve taken too much. Your bush may look like a handful of sticks for a few weeks. Then, almost overnight, red shoots appear at every bud, and by early summer you’ll have a fuller, healthier plant covered in flowers. That moment is what turns nervous first-timers into confident rose growers.
Keep a simple note in your garden journal or on our month-by-month garden calendar about when you pruned and how the plant responded. Over a few seasons, you’ll learn exactly what your roses like in your yard and your climate. Sharp tools, a good angle and a little courage are really all it takes.
Written by
Rosa Bell
Rosa is a master gardener who grows 40 kinds of tomatoes and names none of them.
11Articles
2026Writing since
Read next
DIY ProjectsBuild Your First Raised Garden BedWood, soil and what to plant first. GardenBackyard Chickens: What Nobody Tells YouCoops, rules and a lot of fresh eggs.
 DIY ProjectsPotting Bench Projects for a WeekendA simple build that organizes everything.
 GardenGrowing Tomatoes: From Seedling to SandwichSun, support and steady water.
 HouseplantsRepotting Houseplants: When and HowRoots, pot size and fresh soil.
 DecorPatio Lighting Ideas for Long Summer NightsString lights, lanterns and safe outdoor wiring.
 DIY ProjectsComposting at Home: Easier Than You ThinkGreens, browns and a little patience.
 GardenStarting Seeds Indoors: A Beginner’s GuideTrays, light and the patience to wait.
 DIY ProjectsBuilding a Simple Fire Pit AreaGravel, chairs and safety rules.
2 Comments
Thanks for explaining this so clearly.
Great reporting — please keep following this story.